|
|
||
|---|---|---|
| bin | ||
| config | ||
| lib | ||
| locales | ||
| public | ||
| routes | ||
| test | ||
| views | ||
| .dockerignore | ||
| .eslintignore | ||
| .eslintrc.json | ||
| .gitignore | ||
| .travis.yml | ||
| Dockerfile | ||
| LICENSE | ||
| README.md | ||
| app.js | ||
| app.json | ||
| docker-compose.yml | ||
| gulpfile.js | ||
| jsconfig.json | ||
| package-lock.json | ||
| package.json | ||
README.md
expressCart
![]()
expressCart is a fully functional shopping cart built in Node.js (Express, MongoDB) with Stripe, PayPal, Authorize.net and Adyen payments.


Installation
- Create a folder to hold your installation:
mkdir expressCart - FTP/Copy the contents of the zip to your newly created folder
- Enter folder:
cd expressCart - Install dependencies:
npm install - Start application:
npm start --production - Visit http://127.0.0.1:1111 in your browser
Keeping expressCart running after closing the terminal can be done in a few ways but we recommend using the PM2 package. To set this up:
- Install PM2:
npm install pm2 -g - Add expressCart to PM2:
NODE_ENV=production pm2 start app.js --name "expressCart" - Check PM2 has our app:
pm2 list - Save the PM2 config:
pm2 save - To start/stop:
pm2 start expressCart/pm2 stop expressCart
Note: Node.js version 7.x or greater is needed.
Docker
The easiest way to get up and running is using Docker. Once the Docker CLI is installed from https://www.docker.com/get-docker.
- Enter the root of the expressCart application
- Change
/config/settings.json-"databaseConnectionString": "mongodb://mongodb:27017/expresscart" - Run:
docker-compose up --build - Visit http://127.0.0.1:1111 in your browser
Deploy on Heroku

Note: When deploying to Heroku you will need to configure your external MongoDB either on your own server or a hosted service on mLab, AWS etc.
Sample/Test data
Sometimes you might want some default sample/test data. To create this, run npm run testdata. Remember to only run this initially or anytime you want to reset the data as this function deletes ALL existing data.
API
There is currently a limited API for certain functions of the app. Using the API can be done by firstly generating an API key via the Admin login. Admin > My Account > API Key (Generate) button. Once an API Key is generated it will need to be supplied in a header called apiKey to authenticate requests.
Hooks / Integrations
On the completion of a order if a orderHook URL is configured, expressCart will POST the data to the configured URL. This is handy or IFTTT or Zapier Webhooks where you may want to use the integration methods to retrieve the order details in other systems.
Example use might be to send all orders to a Google Docs spreadsheet or an accounting package or a packing slip software etc.
Admin
Visit: http://127.0.0.1:1111/admin
A new user form will be shown where a user can be created.
Styling
Adding your own custom style is done by accessing the Admin panel then selecting General settings.
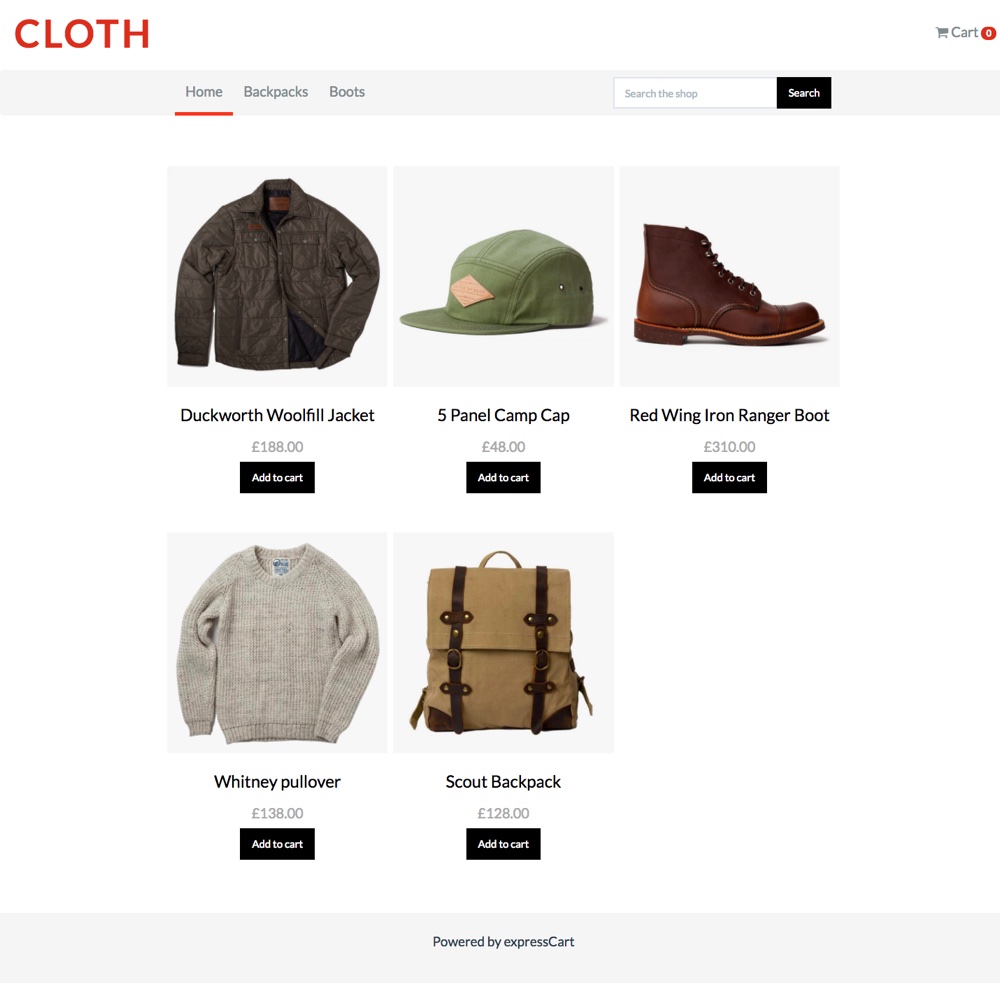
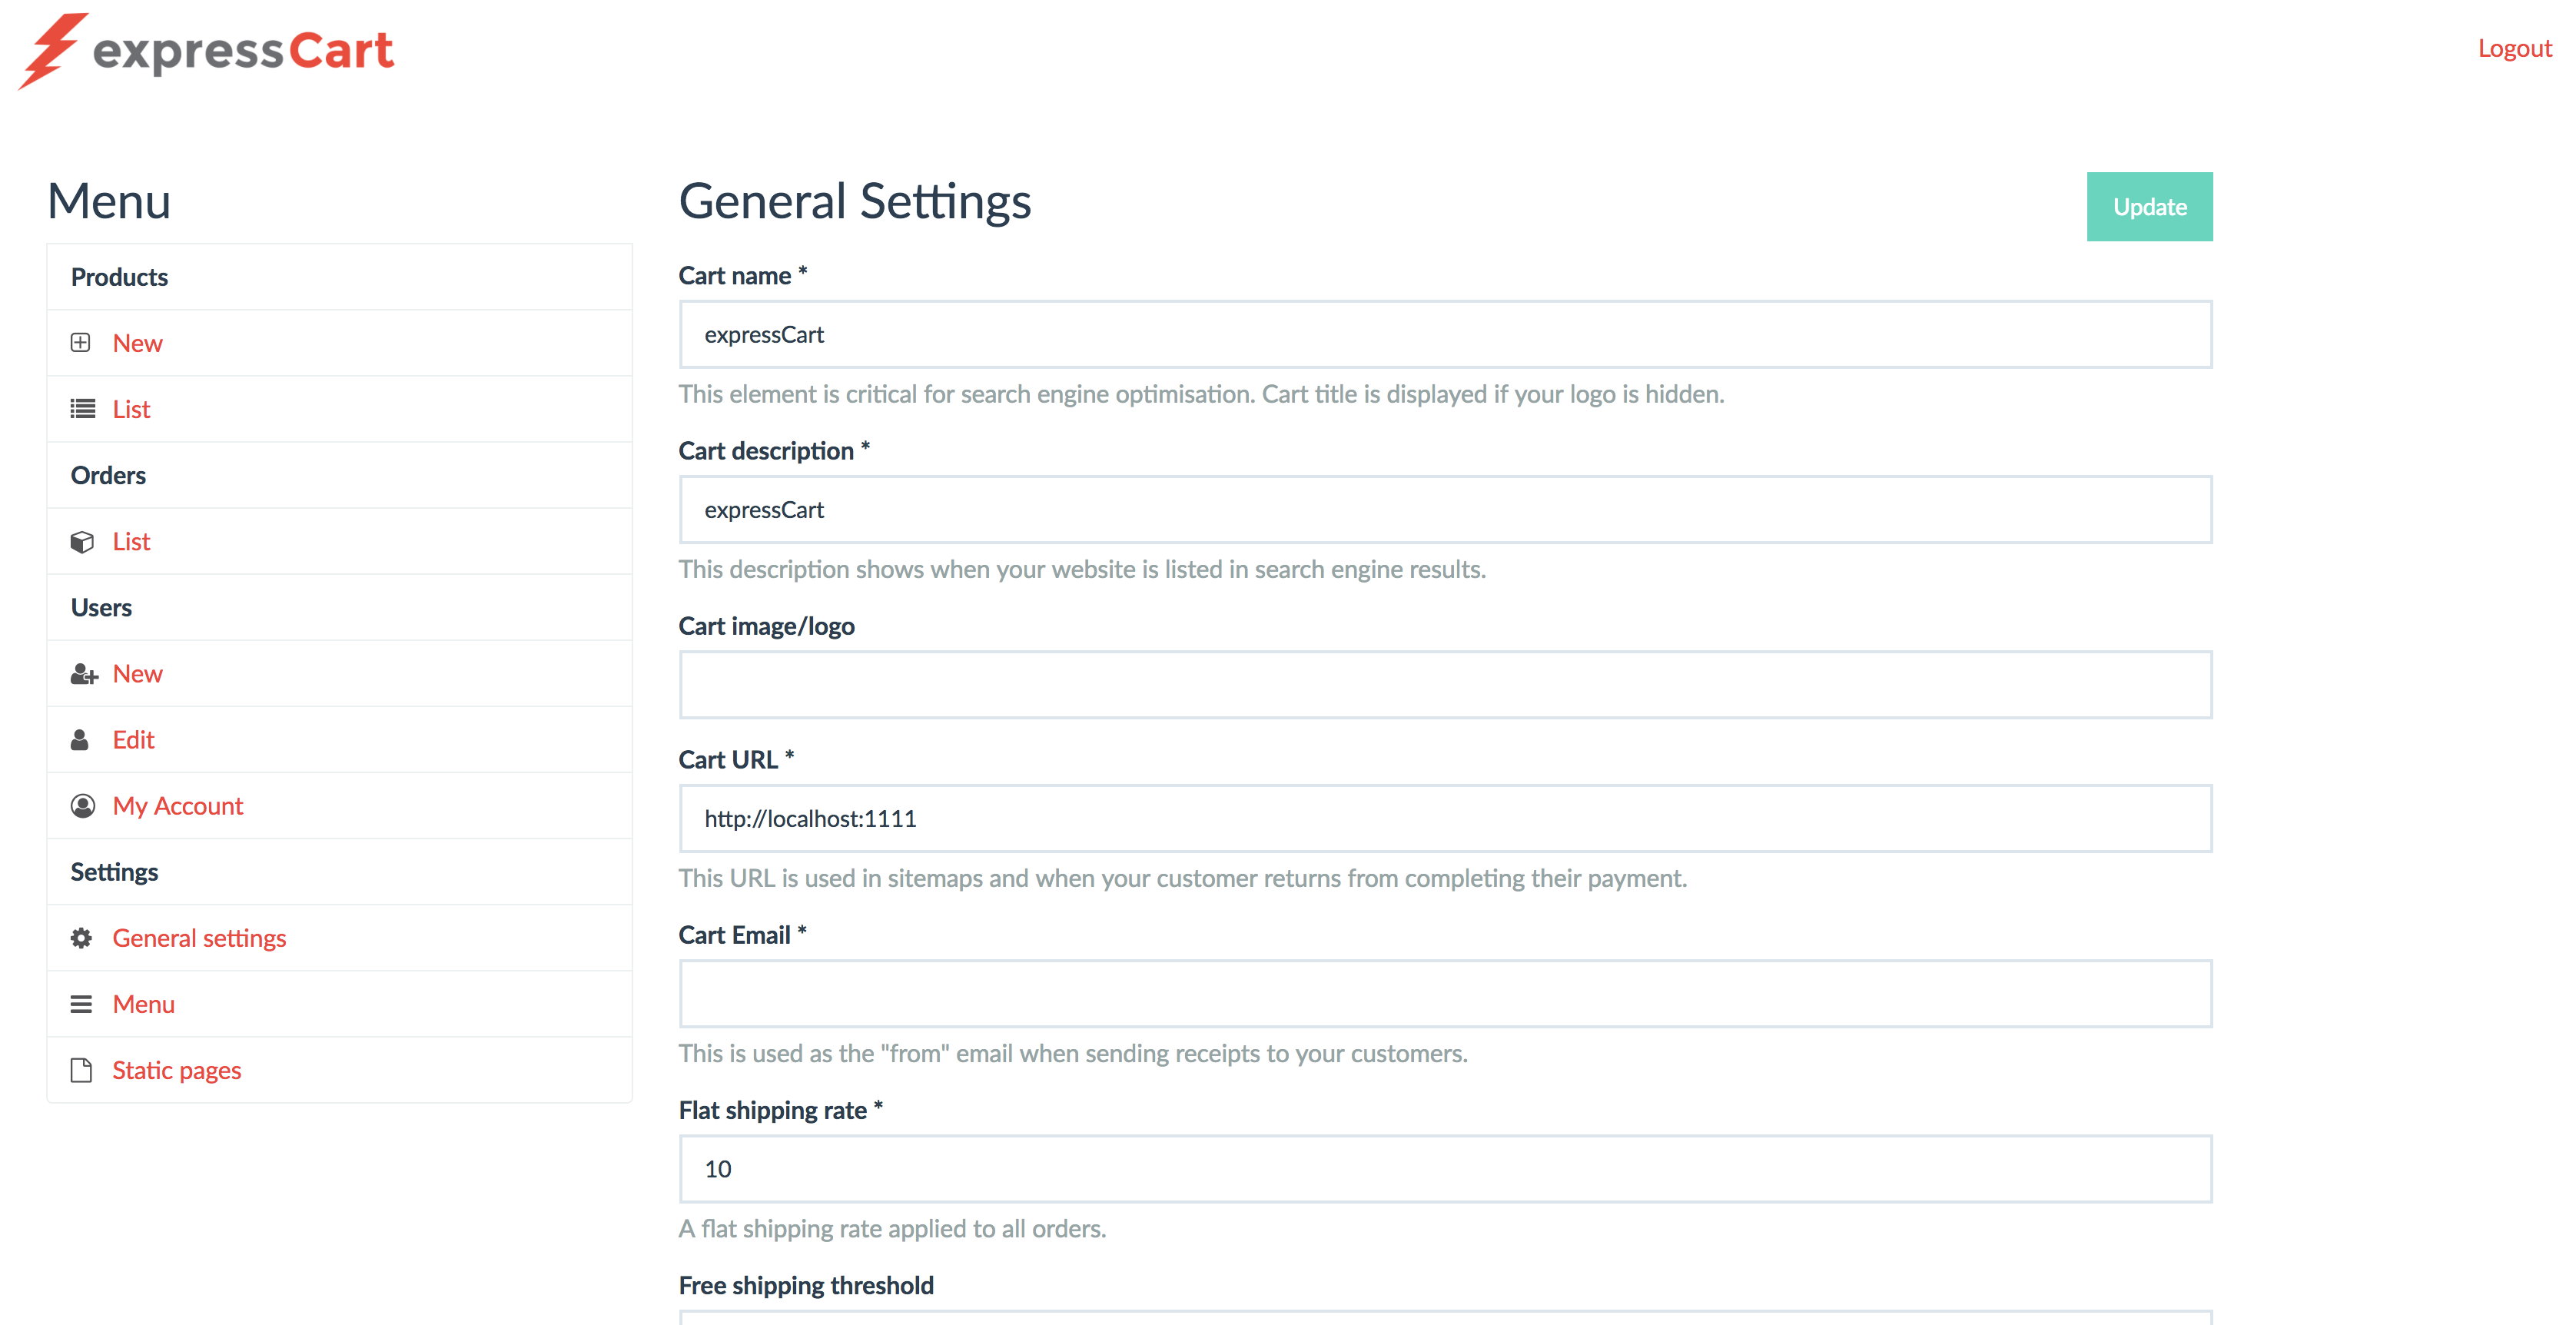
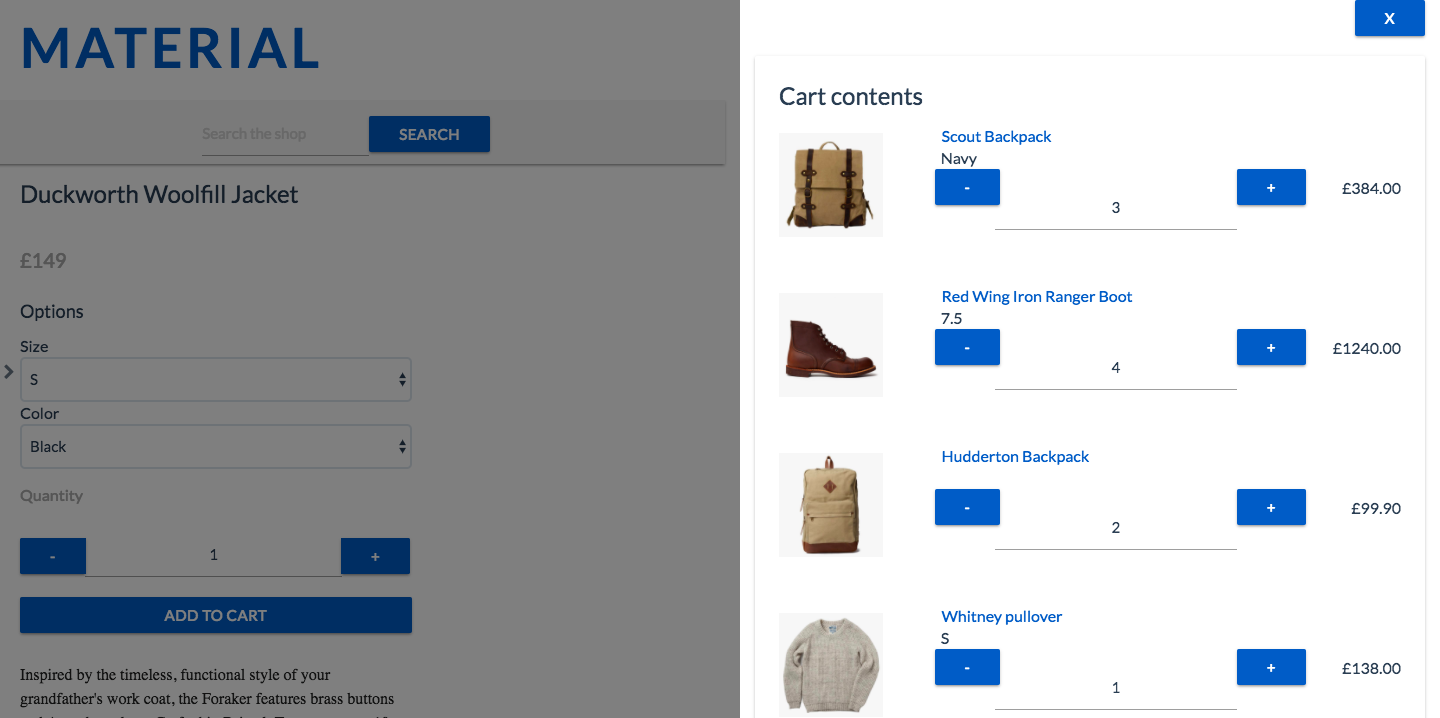
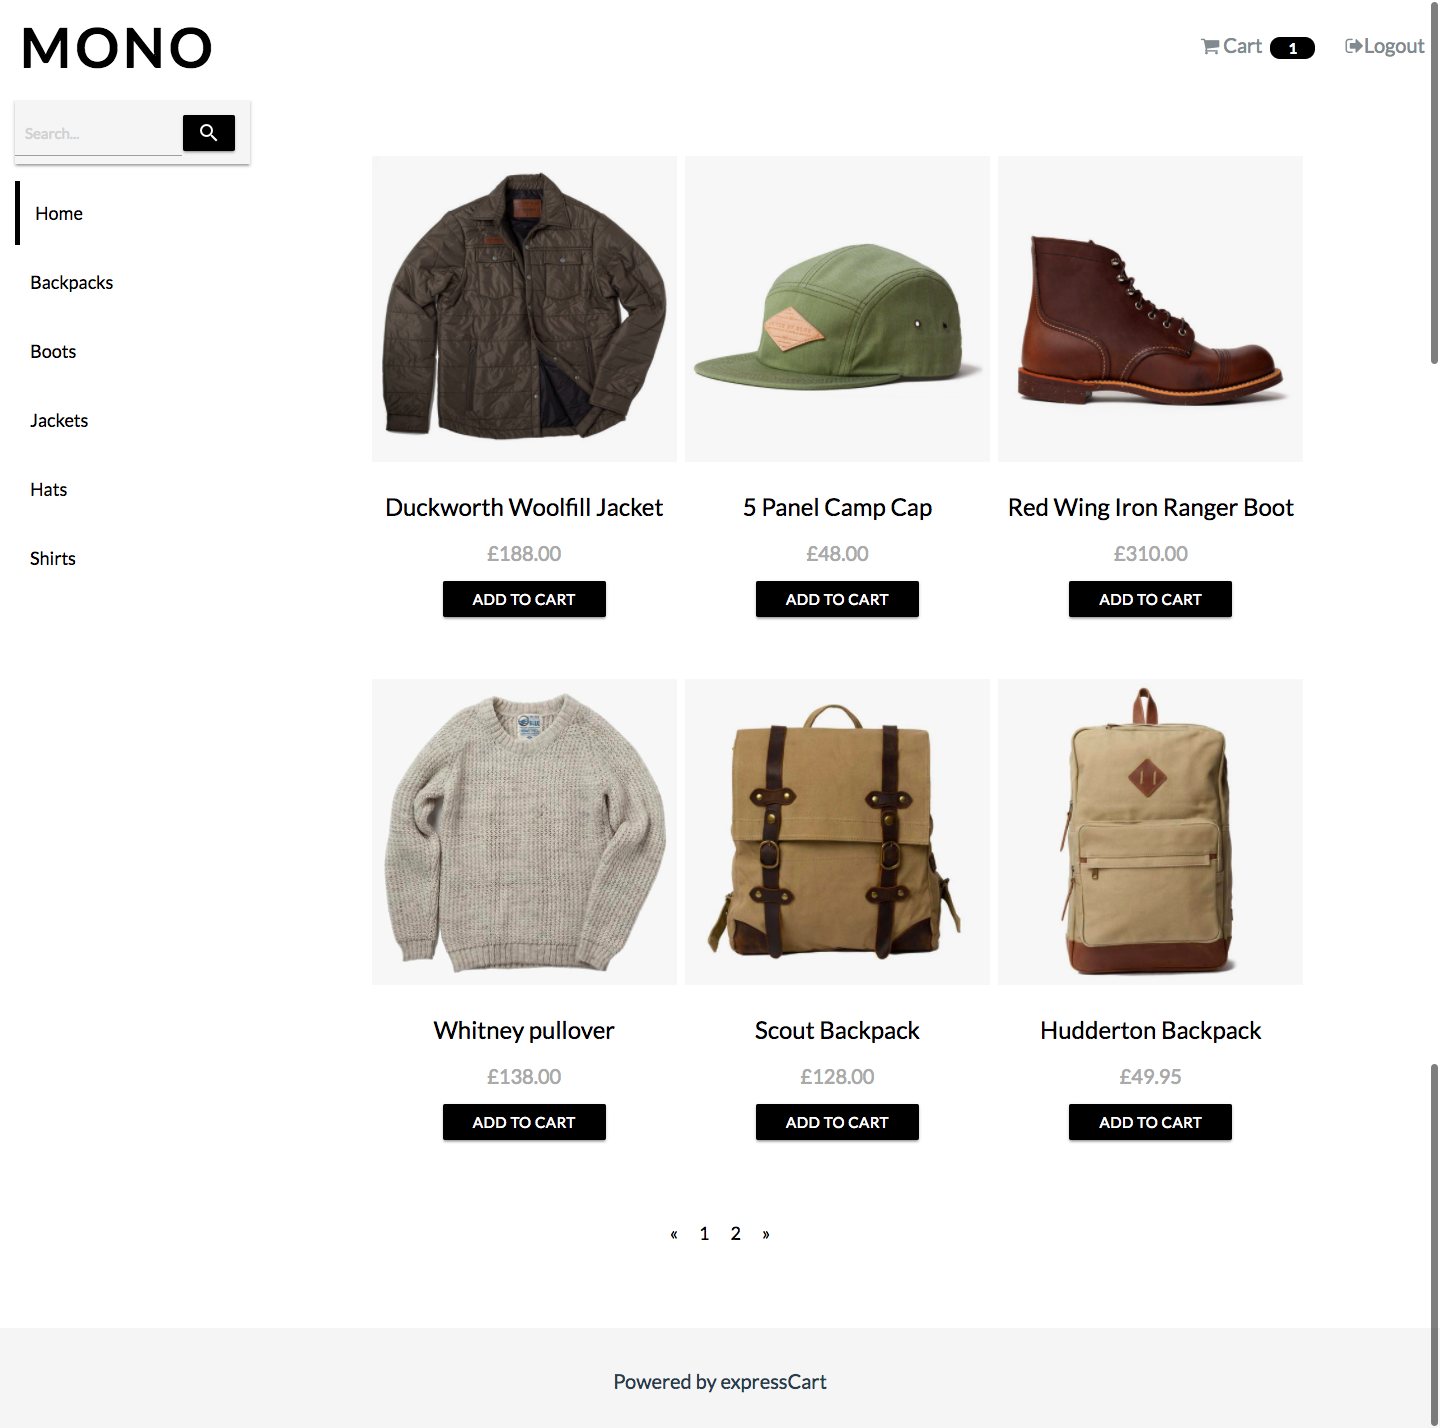
Demo images
Sample homepage
Admin page
Popout cart
Great themes
CSS
You can add your own custom CSS into the Custom CSS box. This will be minified and added to each page.
Footer
You can add your own custom HTML footer which may have contact details, social media links etc into the Footer HTML box. This will be added to bottom of each page.
Products
Adding of new products is done via /admin/product/new.
Product price
Set this value to a full 2 decimal value with no commas or currency symbols.
Permalink
A permalink is a nice link to your product which is normally shown in search engine rankings. By default, a no Permalink value is set when adding a product one will be generated using the Product title with spaces replaced by dashes.
Options
You may want to set product options such as Size, Color etc.
Below is an explanation of the fields and what they do
Name = Something easy to recognize to administer
Label = This will be shown to the customer (eg: Select size, Select color etc)
Type = You can set the option to a Select (drop down menu), Radio (An optional button) or a Checkbox for an on/off or true/false option
Options = Available options are added using a comma separated list. For size options you may set: Small,Medium,Large or S,M,L
Note: An Options value is not required when Type is set to Checkbox.
Product tag words
Tags are used when indexing the products for search. It's advised to set tags (keywords) so that customers can easily find the products they are searching for.
Subscriptions (Stripe only)
You are able to setup product subscriptions through Stripe. First setup the Plan in the Stripe dashboard then enter the Plan ID (Formatted: plan_XXXXXXXXXXXXXX) when creating or editing a product. When purchasing, a customer can only add a single subscription to their cart at one time. Subscriptions cannot be combined with other products in their cart. On Checkout/Payment the customer and subscription is created in Stripe and the billing cycle commences based on the plan setup.
Subscription Webhooks (Stripe only)
You are able to configure a Webhook in Stripe to receive subscription updates on successful/failed payments here. The expressCart Webhook endpoint should be set to: https://<example.com>/stripe/subscription_update. You will need to set the Events to send value to both: invoice.payment_failed and invoice.payment_succeeded.
Database
expressCart uses a MongoDB for storing all the data. Setting of the database connection string is done through the /config/settings.json file. There are two properties relating to the database connection:
Example MongoDB configuration:
{
    "databaseConnectionString": "mongodb://localhost:27017/expresscart"
}
Note: The databaseConnectionString property requires a full connection string. You may need to add authentication parameters to your connection string.
For a good and reasonably priced MongoDB Host, we recommend mLab.
Configuration
Settings can be managed from the admin panel (http://127.0.0.1:1111/admin) with the exception of the Payment gateway and database settings.
All settings are stored in json files in the /config directory. The main application-level settings are stored in /config/settings.json while payment gateway settings are stored in files in the /config directory named after the payment gateway. For example, configuration for the Stripe payment gateway is stored in /config/stripe.json.
Local configuration
If you'd rather store settings in a file which isn't checked into version control, you can create a new settings file at /config/settings-local.json and store your complete settings there. When viewing or editing settings in the admin panel, expressCart will detect the existence of this file and update it accordingly.
This can also be used for payment modules too. Any settings in the /config/<gateway>-local.json file will override the /config/<gateway>.json file.
Cart name and Cart description
These values are used for search engine optimization (SEO) purposes. They will be used as the title and description when your website is listed in Google and other search engines.
The Cart name is also used if there is no logo set.
Cart image/logo
Generally you would place your logo into the /uploads folder. You would then add the value /uploads/mylogo.png to the Cart image/logo setting value.
Cart URL
This value is vital for your cart to work. Set this value to your domain name/URL which customers will access your website. This value is used in returning from Paypal payments and the sitemap for search engine indexing.
Cart Email
This email is used for any email receipts which are sent by your website.
Free shipping threshold
expressCart allows for the addition of a free shipping threshold. The cart will remove the shipping costs once the order has exceeded the Free shipping threshold
value. If the value of the cart is beneath the Free shipping threshold, the cart will add the Flat shipping rate to the total amount.
Payment Gateway
This determines which payment gateway to use. You will also need to configure your payment gateway configuration file here: /config/<gateway_name>.json
Currency symbol
Set this value to your chosen currency symbol. Eg: $, £, €.
Themes
Themes are a set of handlebars views and a stylesheet file. See Cloth theme as example.
Themes are loaded from /views/themes/.
It would be great to have some themes contributed back for others to use.
Number of Products per page
You can set the number of products per page by changing the Products per page value to a whole number of your choice. You may want to ensure
the number of products per page matches up with the Products per row value. Eg: if you have the Products per row value set to 3, you may want
to ensure the Products per page is a multiple of 3 for the best look.
Number of Products per row
This is the number of products displayed per row on your website. You can select anywhere up to 4 Products per row.
Menu enabled
Enables/disable the menu setup in /admin/settings/menu.
Menu header
This is the text which will be displayed at the top of your menu.
Menu position
You can set position where your menu will be displayed. Setting the value to side will position the menu to the left of your products, setting the value to top
will create a 'breadcrumb' menu at the top of the page
Paypal (Payments)
The Paypal config file is located: /config/paypal.json. A example Paypal settings file is provided:
{
    "mode": "live", // sandbox or live
    "client_id": "this_is_not_real",
    "client_secret": "this_is_not_real",
    "paypalCartDescription": "expressCart", // Shows as the Paypal description
    "paypalCurrency": "USD" // The Paypal currency to charge in
}
Note: The client_id and client_secret is obtained from your Paypal account.
Stripe (Payments)
The Stripe config file is located: /config/stripe.json. A example Stripe settings file is provided:
{
    "secretKey": "sk_test_this_is_not_real",
    "publicKey": "pk_test_this_is_not_real",
    "stripeCurrency": "usd", The Stripe currency to charge in
    "stripeDescription": "expressCart payment", // Shows as the Stripe description
    "stripeLogoURL": "http://localhost:1111/images/stripelogo.png" // URL to the logo to display on Stripe form
    "stripeWebhookSecret": "whsec_this_is_not_real"
}
Note: The secretKey, publicKey and stripeWebhookSecret is obtained from your Stripe account dashboard.
Authorize.net (Payments)
The Authorize.net config file is located: /config/authorizenet.json. A example Authorize.net settings file is provided:
{
    "loginId": "loginId",
    "transactionKey": "transactionKey",
    "clientKey": "clientKey",
    "mode": "test"
}
Note: The credentials are obtained from your Authorize.net account dashboard.
Adyen (Payments)
The Adyen config file is located: /config/adyen.json. A example Adyen settings file is provided:
{
    "environment": "TEST",
    "apiKey": "this_is_not_real",
    "publicKey": "this_is_not_real",
    "merchantAccount": "this_is_not_real",
    "statementDescriptor": "a_statement_descriptor",
    "currency": "AUD"
}
Note: The publicKey, apiKey and merchantAccount is obtained from your Adyen account dashboard.
Email settings
You will need to configure your SMTP details for expressCart to send email receipts to your customers.
You will need to consult your email provider for the relevant details.
Gmail settings
Email SMTP Host= smtp.gmail.comEmail SMTP Port= 465Email SMTP secure= True/CheckedEmail SMTP Username= example@gmail.comEmail SMTP Password= yourpassword (you may need to setup an application specific password for this to work)
Zoho settings
Email SMTP Host= smtp.zoho.comEmail SMTP Port= 465Email SMTP secure= True/CheckedEmail SMTP Username= example@zoho.comEmail SMTP Password= yourpassword
Outlook settings
Email SMTP Host= smtp-mail.outlook.comEmail SMTP Port= 587Email SMTP secure= False/UncheckedEmail SMTP Username= example@outlook.comEmail SMTP Password= yourpassword
You can use the Send test email button to ensure your email settings are correct.
Menu
Although expressCart is a search based shopping cart, you can also group your products into categories using tags. You can then setup menu Items to "filter" based on
keywords (tags) to make it easier for your customers.
Setting of menu items is done via /admin/settings/menu.
To add a new menu item to filter products, you will set the menu text using the Menu field and setting the keyword to filter is using the link field.
To add a new menu item to link to a static page, you will set the menu text using the Menu field and set the static page URL using the link field. Eg:
An About page would be set. Menu = 'About Us', Link = 'about`
You can re-order menu items by clicking and dragging the arrows icon and placing the menu item in desired position.
Static pages
You may want to create a static page to show contact details, about us, shipping information etc.
New static pages are setup via /admin/settings/pages.
TODO
- Add some tests...
- Separate API and frontend
- Modernize the frontend
Contributing
I'm looking for contributors of any kind. I'm working on turning the admin panel into something more modern and using Vue.js. The frontend part of the website will always be a normal webapp with no SPA frameworks as I believe eCommerce apps should have SEO as top priority.
Contributing payment providers and themes would be much appreciated. Payment providers are added by simply adding the payment provider file to /routes/payments/providerName.js, then adding the route to the app.js file by adding const providerName = require('./routes/payments/{providerName}'); and mounting the route app.use('/providerName', providerName);.
If you see current code which could be enhanced (note: parts of the code is quite old but new to Github) you are welcome to submit a PR.